Inspired by Bauhaus:
For my nephew’s first birthday, I wanted to create something truly meaningful — a quilt that would bring him comfort, warmth, and a lasting sense of joy as he grows. From the very beginning, I was drawn to the idea of using bright, playful colours to capture the spirit of childhood, combined with a mix of bold shapes.
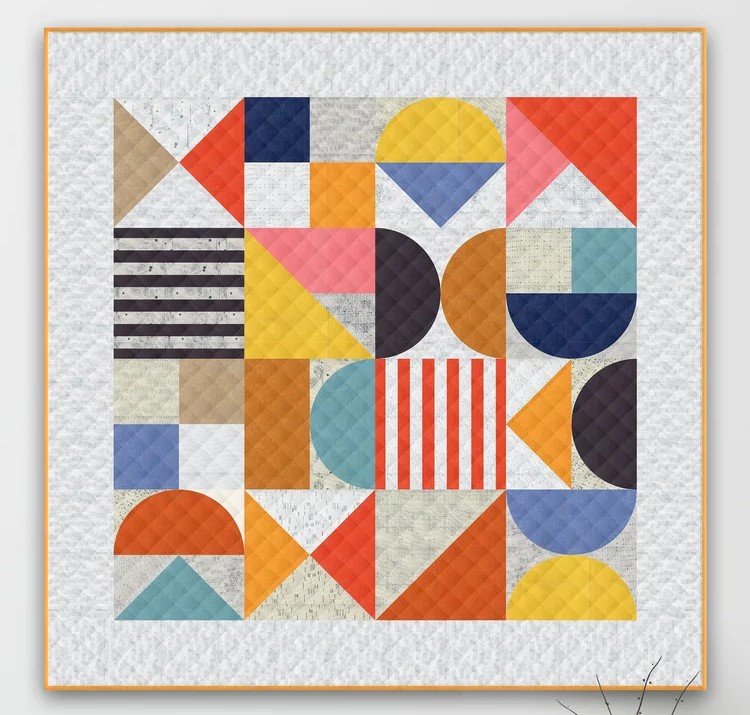
During my search for inspiration, I came across a Bauhaus-inspired quilt design by Zen Chic that perfectly reflected the aesthetic I had in mind. I’ve always found myself gravitating towards Bauhaus-style quilts, with their striking use of geometric forms, clean lines, and vibrant colour palettes. In fact, I realised I had explored similar principles before when making my modern moon baby quilt.
The Design:

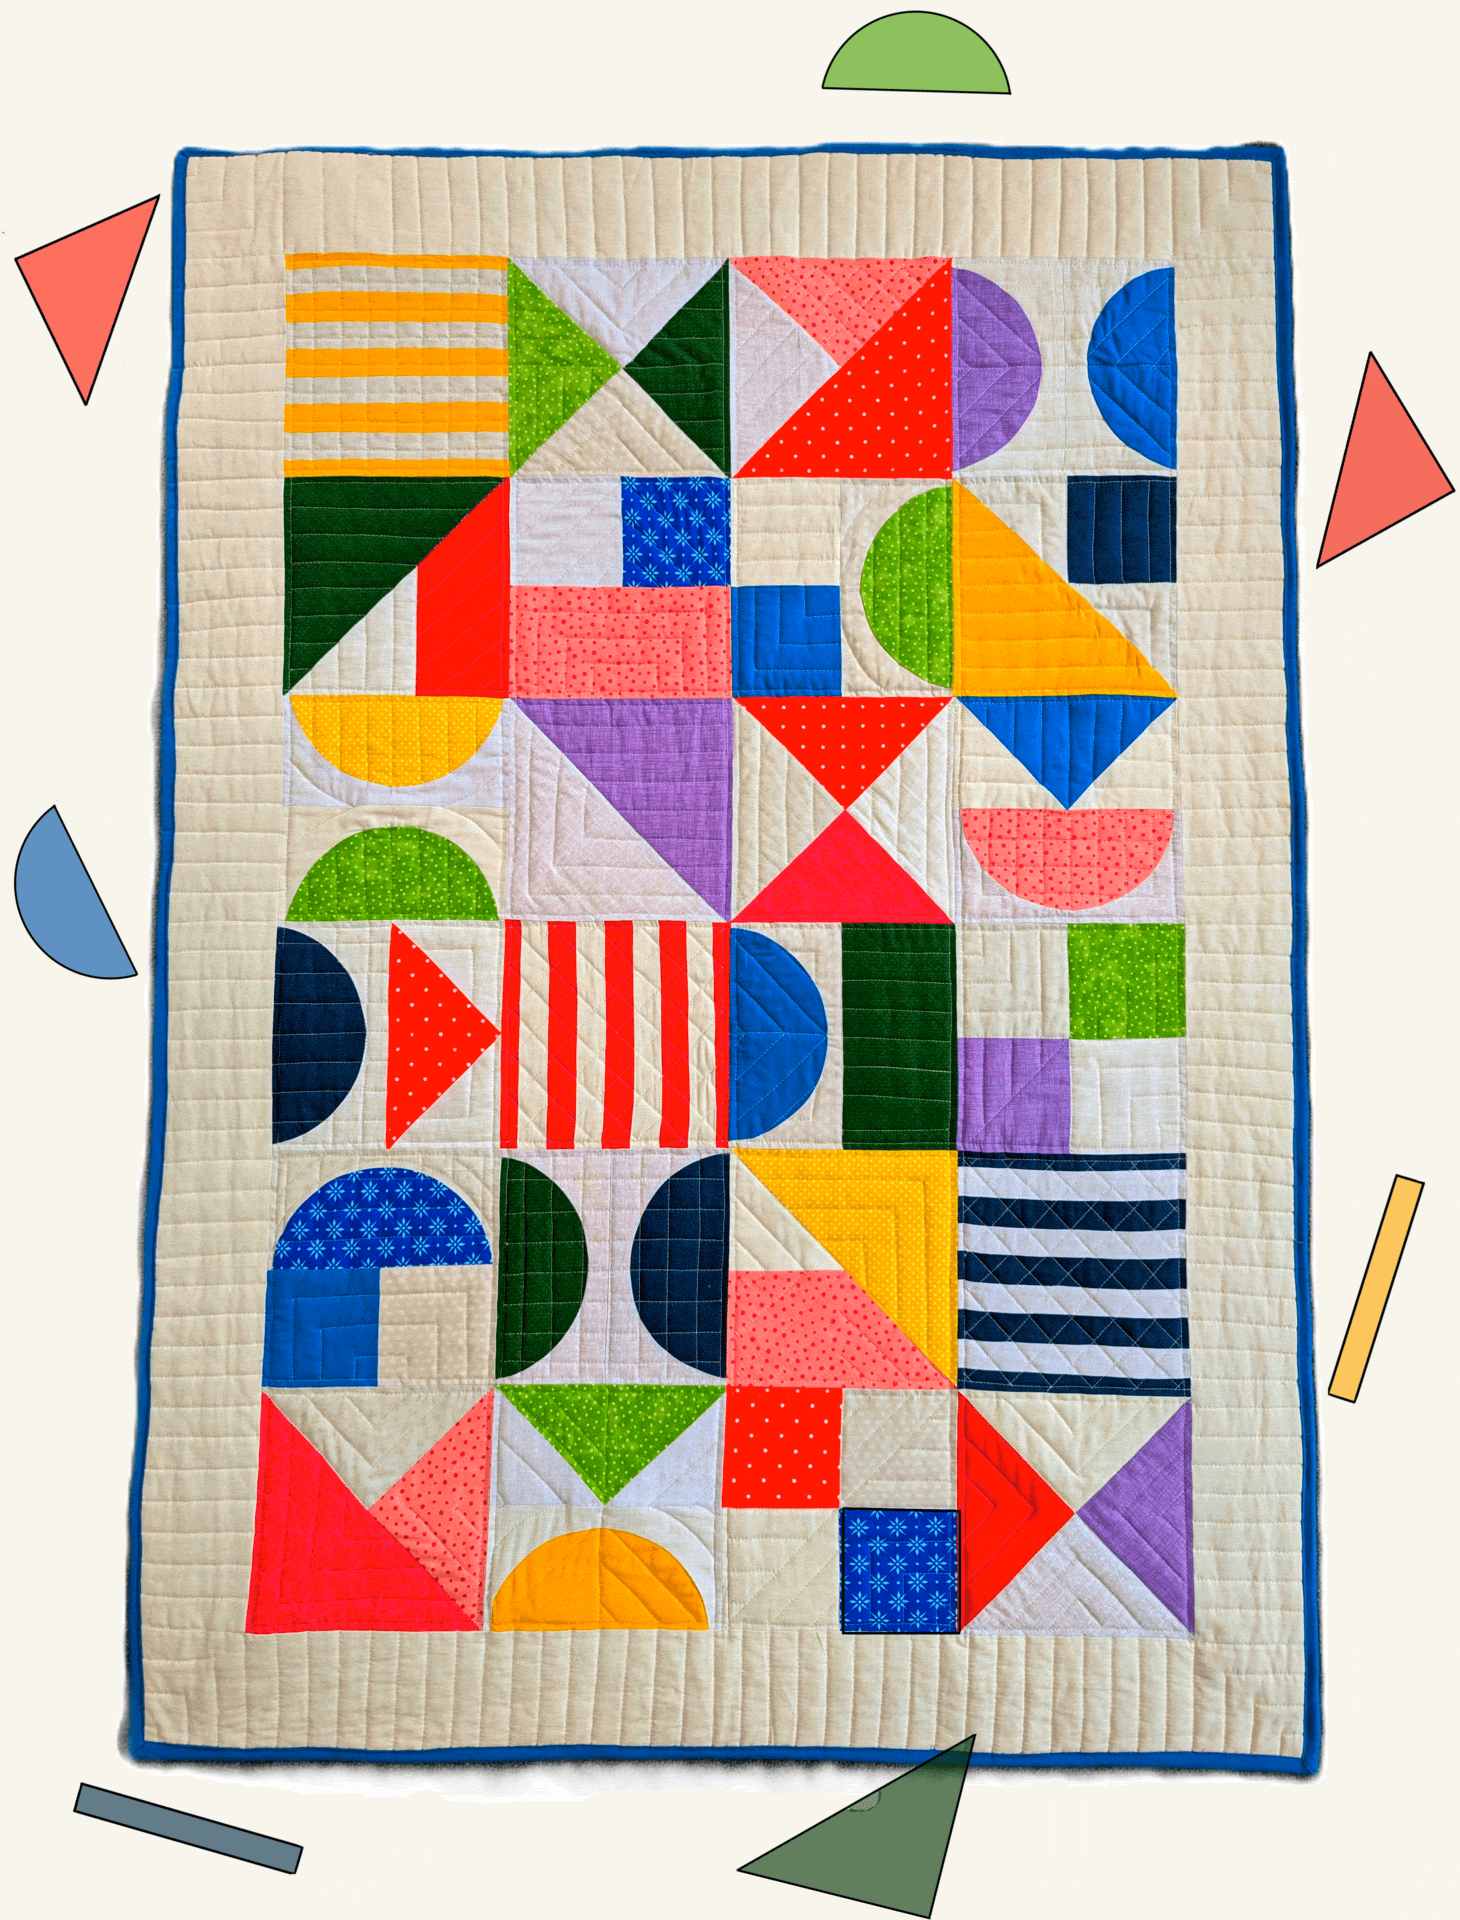
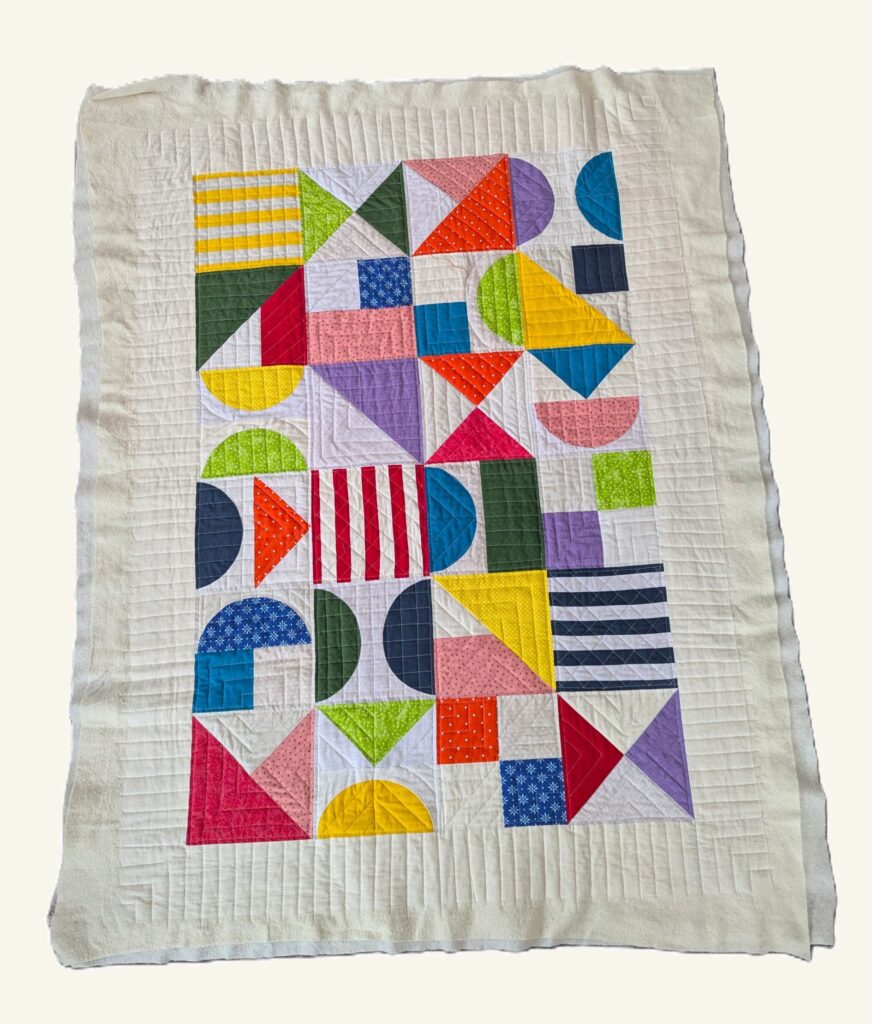
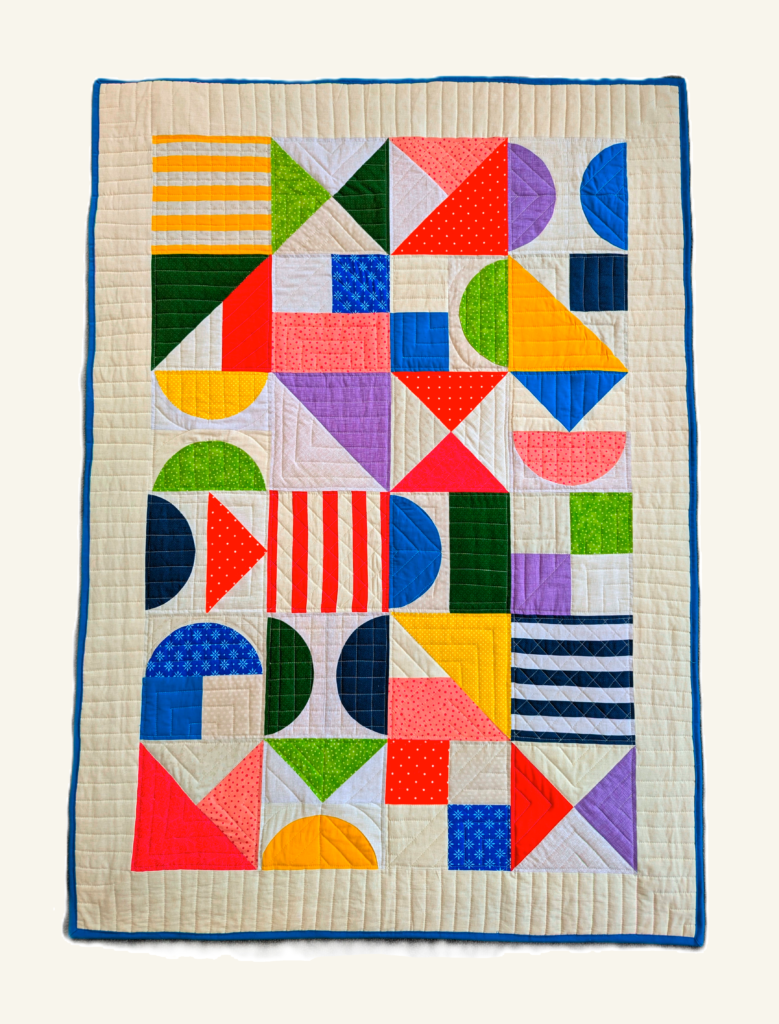
I based my design on the original Bauhaus quilt, but adapted the blocks and colours, and added some variations of my own. As I wanted a custom size, I carefully calculated each block and the individual shapes within them consisting of rectangles, semi-circles, squares, and triangles. While the original quilt consisted of 20 blocks, once I laid everything out, I felt that expanding it to 26 blocks made it more practical making it suitable for a single bed, rug, or wall hanging.
In terms of colour, I followed Bauhaus principles by choosing bold shades with a balance of light and dark tones for maximum impact. Most of the fabrics were solid or very subtly patterned, allowing the shapes to remain crisp against the background. I opted for a relatively neutral white background, using a mix of creams and ivories.
Materials Used:
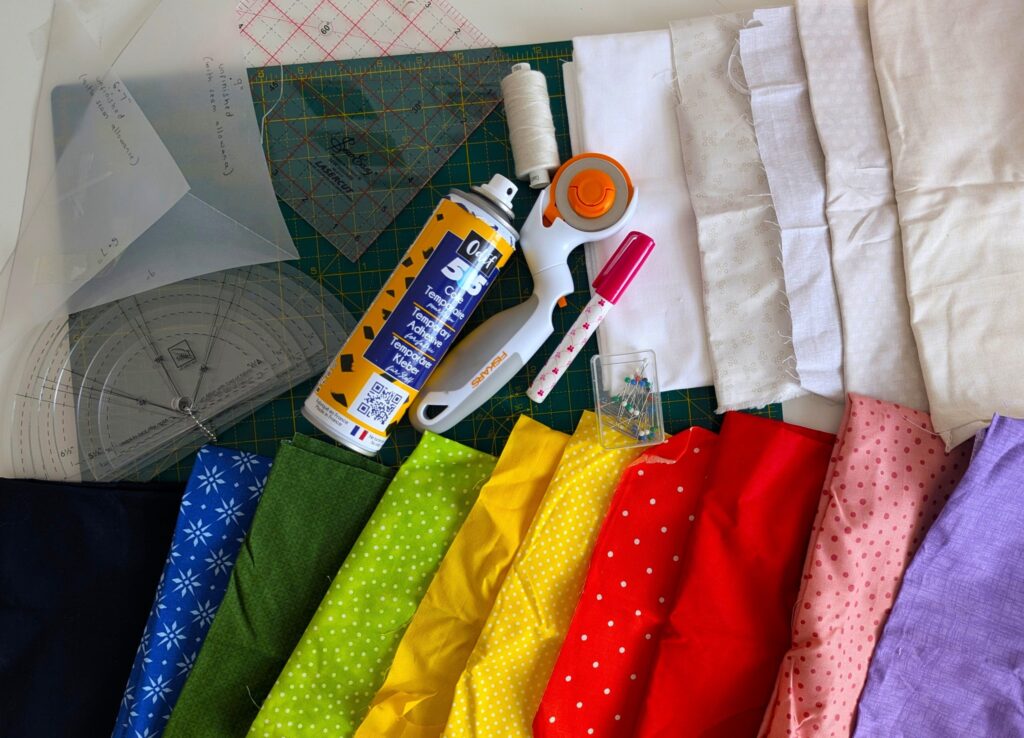
- 11 pieces of coloured cotton fabric
- 6 pieces of neutral ivory/cream cotton fabric
- Rotary cutter
- Quilting ruler
- Triangle template
- Thread
- 100% cotton wadding
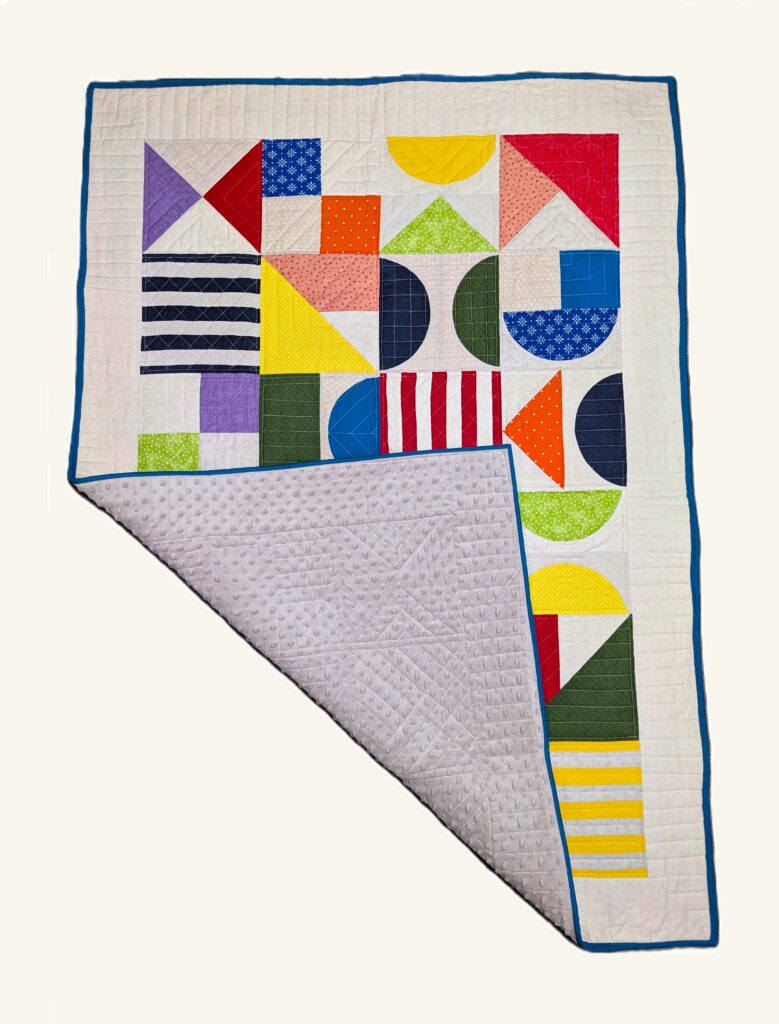
- Minky backing fabric
- Odif 505 adhesive spray
- Walking foot
- Quilting guide tool
- Binding
The Sewing:
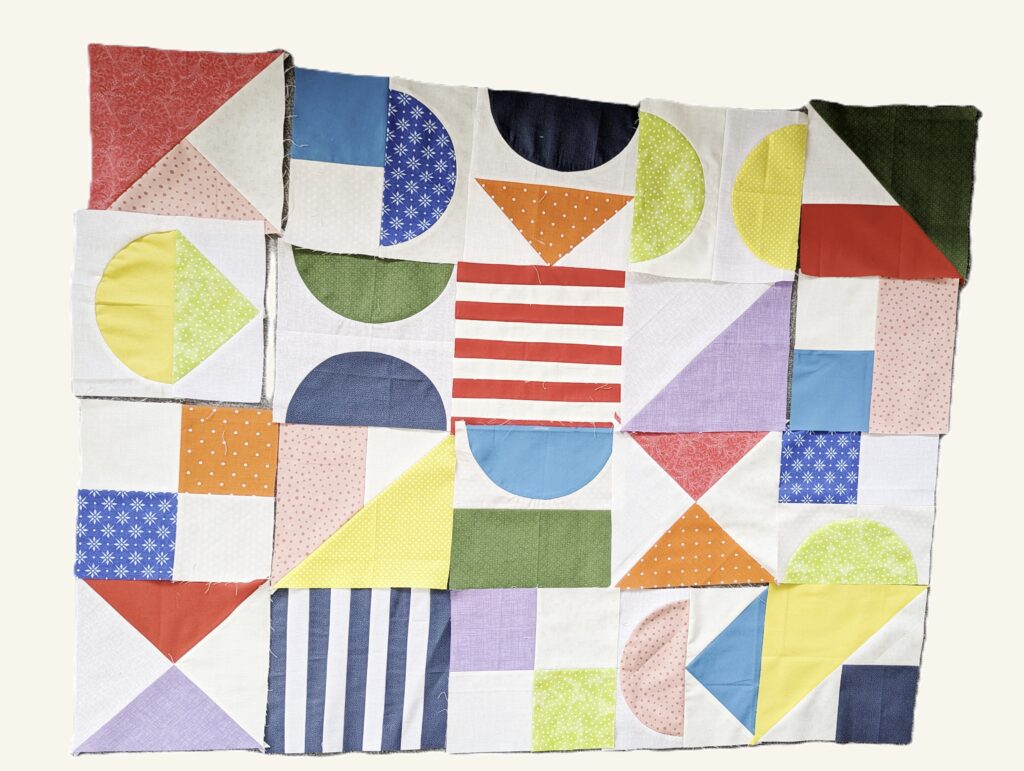
Before getting to the sewing, the first task was cutting out all the pieces. For the 26 blocks, I needed to cut 106 differently sized pieces of fabric. I found it easiest to work by colour, labelling each piece according to its corresponding block.
I then assembled each block individually before sewing them together to create the quilt top. To say it took hours would be an understatement but, dare I say, the hardest part was yet to come: the quilting!
The Quilting:
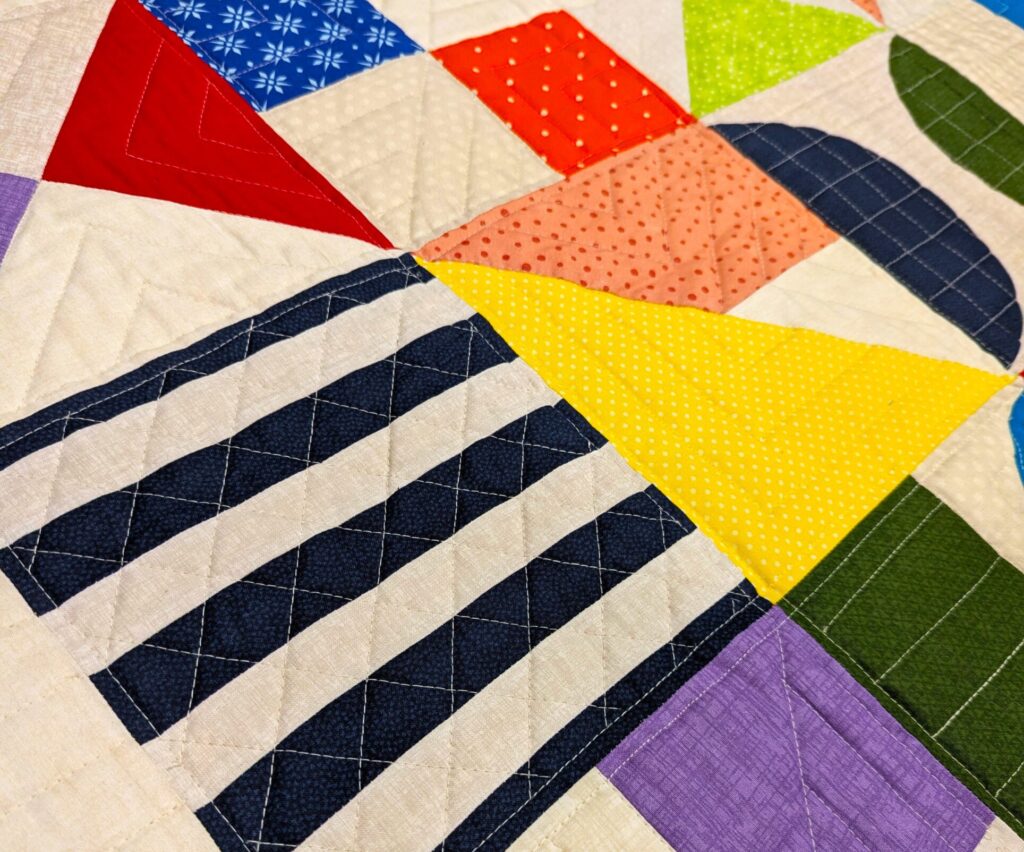
I wanted each block to feature a different quilting design to add another dimension to the quilt. As the blocks were quite angular, I chose to echo this with straight, angular quilting lines, working in parallel or perpendicular to the shapes. This helped the quilting stand out against what might otherwise appear to be a simple block design.

Before starting the quilting, I added 100% cotton wadding and a minky backing fabric, securing all the layers with 505 adhesive spray. I also tacked the layers with thread for extra stability.
As the quilt was quite large, I tackled the quilting one block at a time. To keep the lines straight, I used a quilt guide attachment on my machine, which proved essential in maintaining accuracy and enhancing the crisp finish.
The Final Piece:
This was, without a doubt, a labour of love. The finished quilt measured 65″ by 48″ and I calculated that it took me over 60 hours to complete but it was completely worth it. I’m obsessed with the bright colours, which feel perfect for a baby’s quilt. It may have turned out larger than I first expected, but I hope it will grow with him and be used throughout his childhood, and perhaps even beyond.
Quilting something of this size on a domestic machine also showed me just how much is possible, and I felt really proud of what I achieved with my Pfaff machine.
Most importantly, seeing him happily crawling around on it made it all worthwhile, bringing an extra pop of colour and softness to his bedroom.

Leave a Reply