A Cat‑Inspired Project:
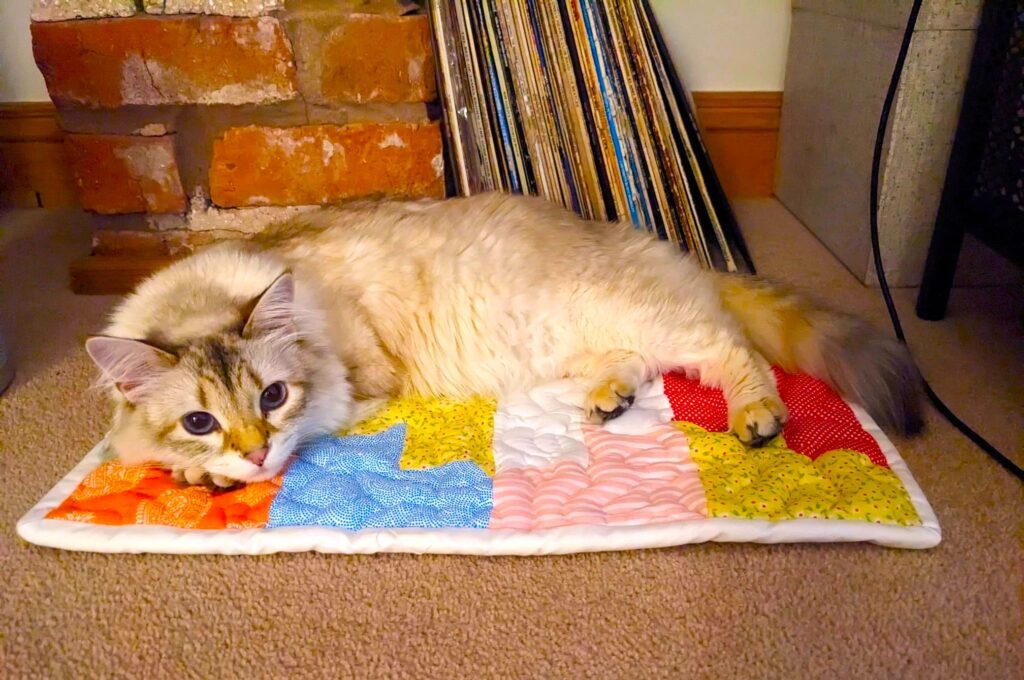
As a lifelong lover of cats, it felt only right that my next sewing project should be inspired by one. My sibling has a Siberian cat called Catiana (often shortened to Yanni), and watching her curl up wherever she feels most comfortable sparked an idea. Cats have a wonderful habit of claiming the smallest and most unexpected spaces as their own, so it felt like the perfect excuse to make her a quilt. Designed to be used as a rug, I wanted this quilt to create a soft and familiar spot where Yanni can relax, lounge, and know without a doubt that it’s her own little corner of the world. With that idea in mind, I began thinking through the design choices that would make the quilt both practical and inviting for a cat to truly settle into.
The design:
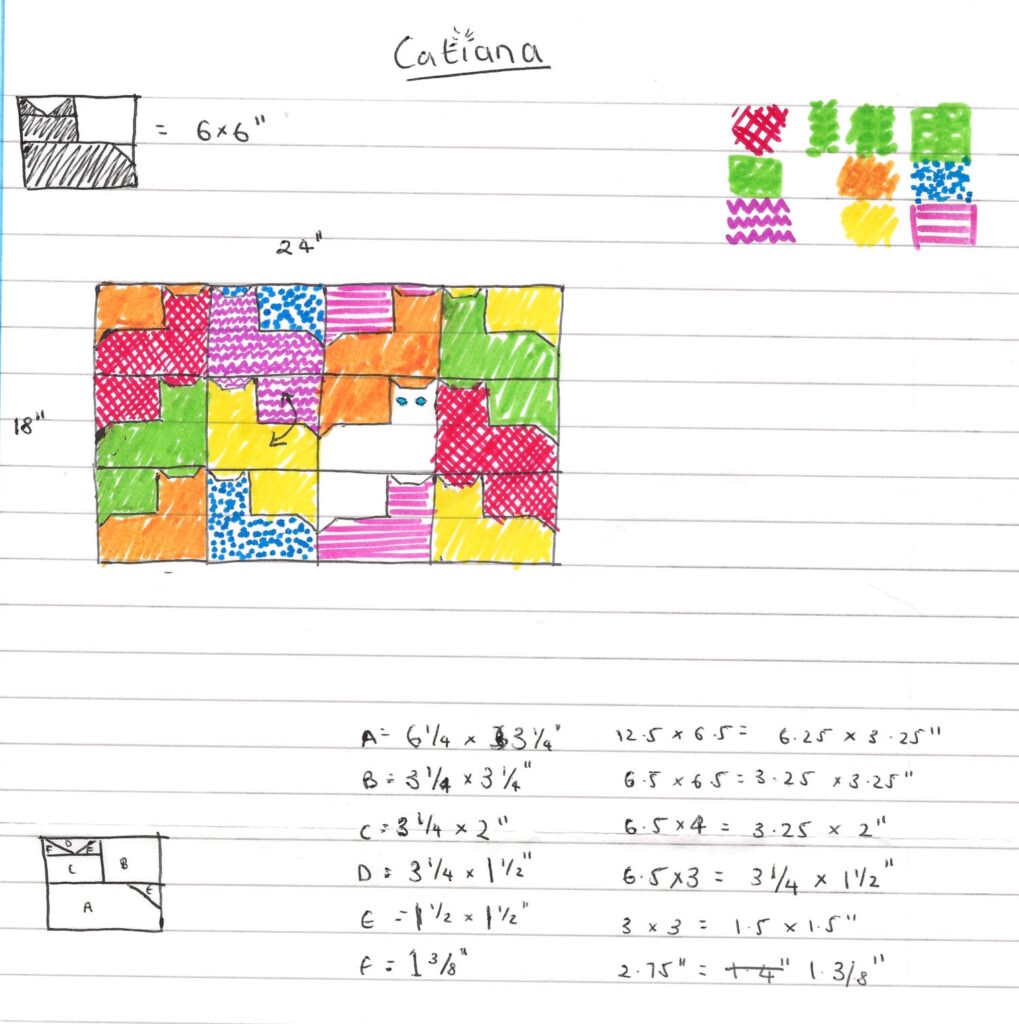
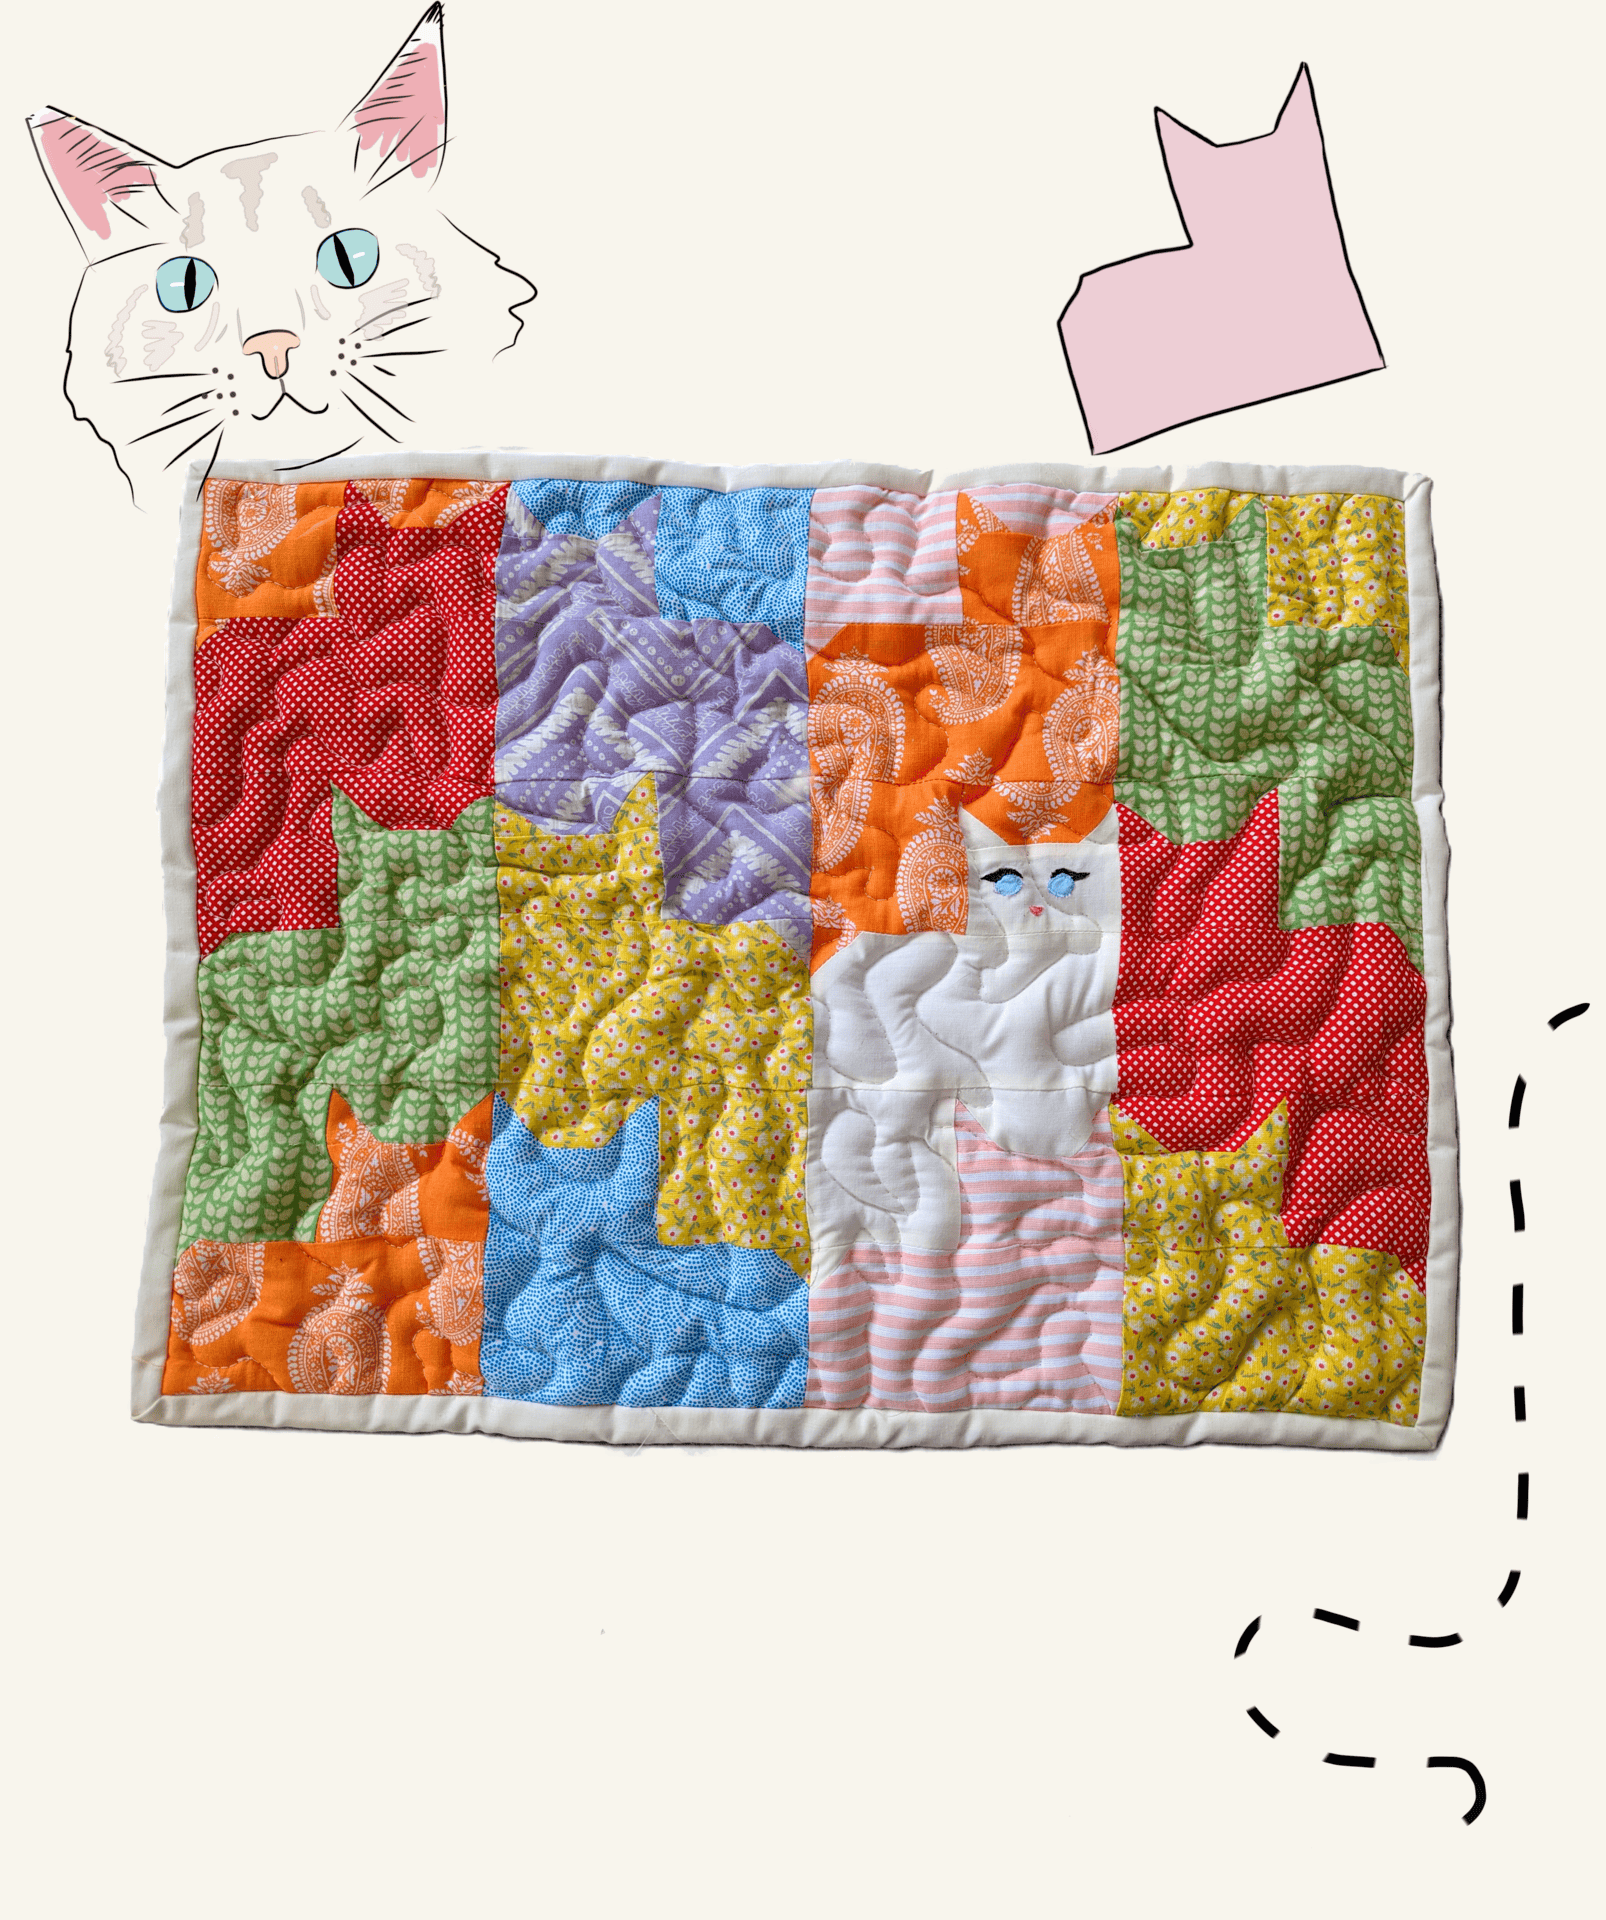
For the design, I knew I wanted to include a cat motif within the quilt itself, while keeping the overall style as a patchwork quilt. The size was intentionally kept on the smaller side so it could be easily used on the sofa or even placed on a car seat, making it a versatile piece. I was drawn to fun, bright colours to give the quilt a playful feel. Most importantly, I wanted to include a version of Yanni herself in the design, adding a personal touch that truly makes the quilt feel like it was created just for her.
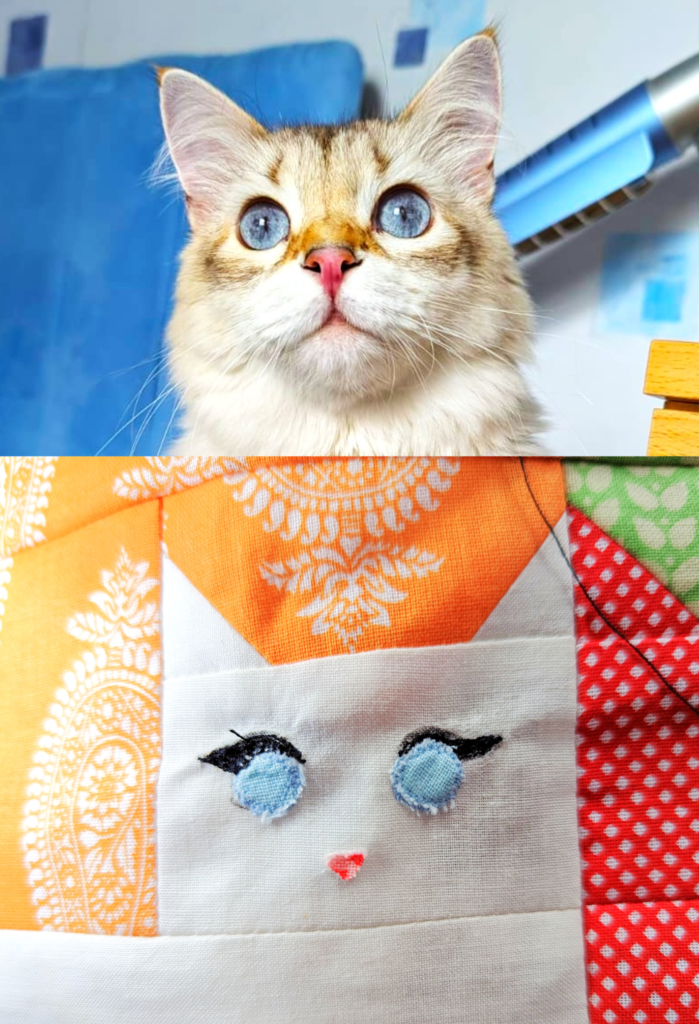
After scouring Pinterest, I came across a simple but effective cat silhouette block by Birch Fabrics. The design is slightly abstract, which means the cat shape isn’t too obvious at first glance, while still clearly referencing a feline form. This also gave me the flexibility to change the colour of one of the blocks to plain white so it could resemble Yanni. To make the block look even more like her, I plan to add blue eyes, along with a stitched nose and whiskers, bringing a little more uniqueness and a personal touch to the quilt.
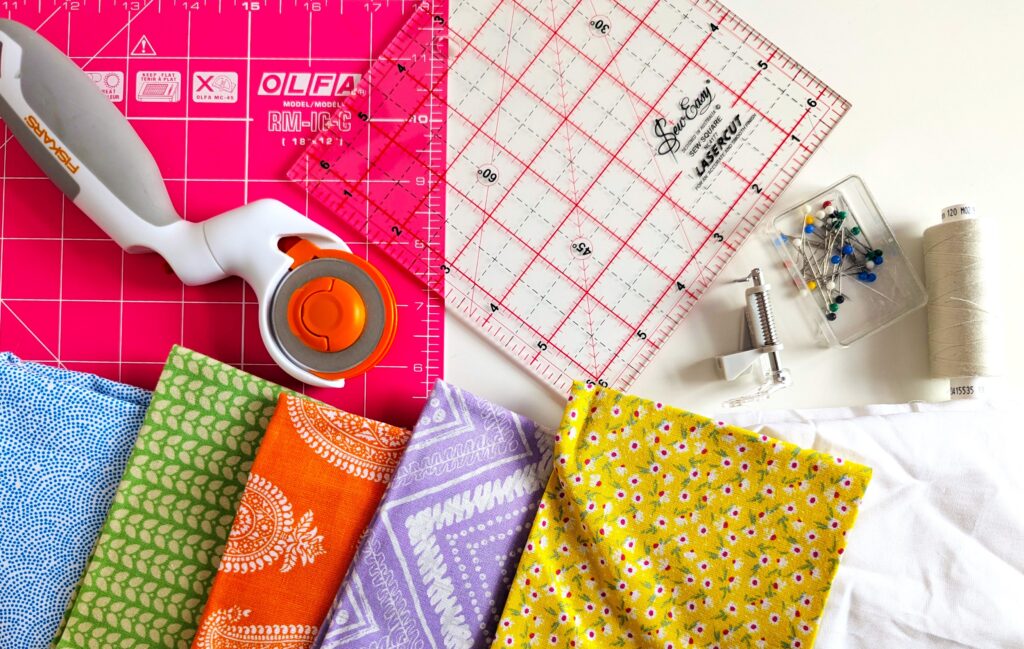
Materials used:
- Rotatory cutter
- Cutting matt
- Quilting ruler
- Thread
- Pins
- Cotton material
- Binding
- Free motion machine foot
The Sewing Process:
Once the design was finalised, I moved on to sewing the quilt top. I started by making the individual patchwork blocks, carefully cutting and piecing them together to keep the shapes neat and consistent. The cat silhouette blocks came together surprisingly quickly, and it was satisfying to see the abstract shapes clearly form a cat once assembled.
To create Yanni’s block piece, I used plain white fabric so it would stand out from the other. After the quilt top was pieced, I added extra details by appliquéing on blue circles for the eyes, along with a small pink triangle for the nose, which really helped the block to become Yanni.
The quilting:
This was my first attempt at doing free motion quilting and I wanted to try out stippling. I found it crucial to pin or tack all three pieces of material (top quilt, batting, and backing) thoroughly together so they don’t move whilst quilting. It took some practice to gage the speed and stitch length (as the dog feeds were down) however it was a cool technique to learn, and I loved the organic and unstructured look it gave which contrasts the straight lines of the patchwork blocks.
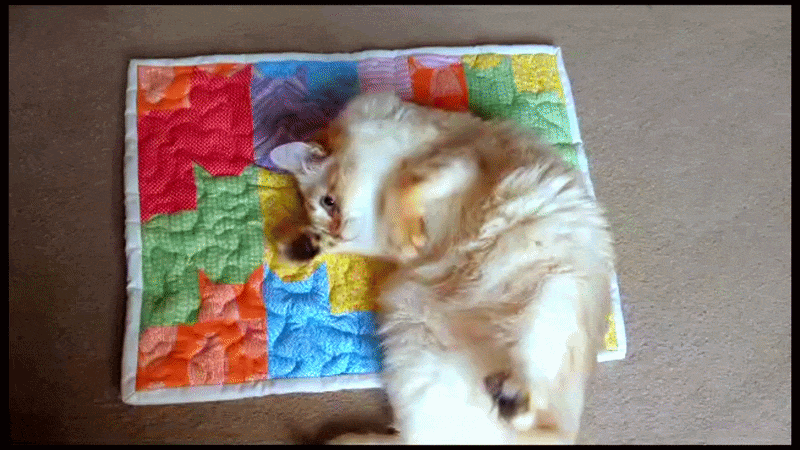
The final piece:
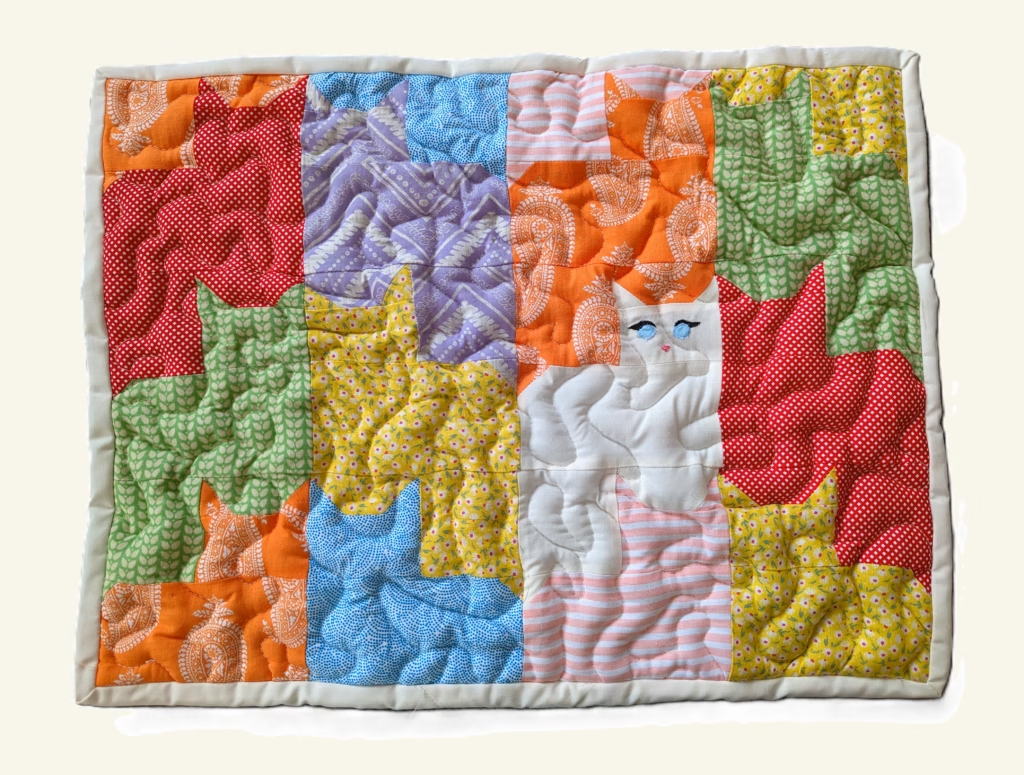
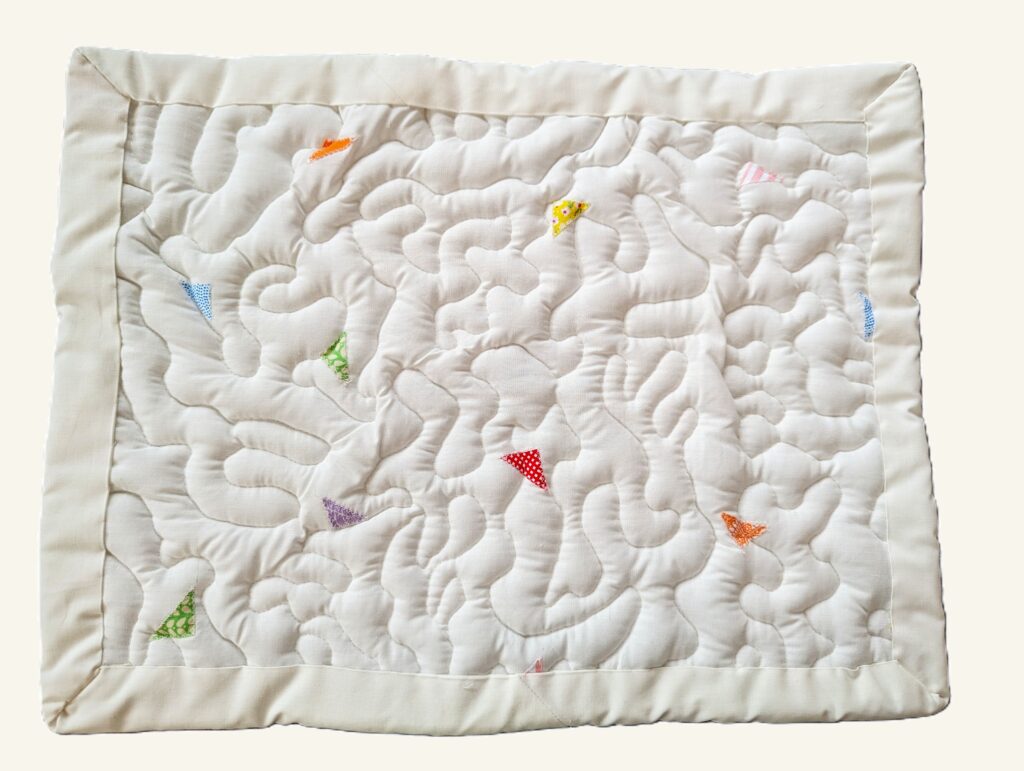
I absolutely love how the bold colours came together, with Yanni and her striking blue eyes right in the centre of the quilt. Placing her there really makes her the focal point and gives the quilt a strong sense of personality. On the back, I used a selection of scrap fabrics to add extra interest, which not only made good use of leftovers but also gave the quilt a fun and unexpected finish.
If I were to make this again, I would experiment with adding tassels to the corners or even fringing around the edge—cats are notoriously drawn to tassels, and I can just imagine Yanni going on the attack. I would also make the quilt slightly bigger, as I definitely underestimated her size. That said, none of that mattered in the end. As soon as the quilt was brought home, Yanni instantly knew it was hers, and seeing her settle onto it straight away made the whole project completely worth it.
Leave a Reply